Search Pattern
Important! Starting with version 1.25.1, the old pattern editor is considered outdated. For new projects, use the New Pattern Editor.
A Search Pattern is a property of a number of Studio elements that is used to interact with the program’s user interface. The pattern allows you to identify an application component and gain programmatic access to it.
The Search Pattern property is available, for example, in the Mouse Click element – it is used to define the application button that you need to click.
General Information
A pattern is a JSON file that contains a defined set of properties for identifying a component. It can be formed manually or automatically. The automatic method is the preferred scenario.
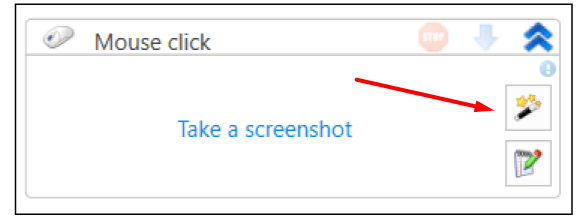
To automatically form a pattern, use the ![]() button – it invokes the control capture in the corresponding application category. The button is located on the element panel or in its properties.
button – it invokes the control capture in the corresponding application category. The button is located on the element panel or in its properties.
You can modify the pattern in two ways:
- In the JSON file editing format. To open the file, click the ellipsis icon in the Search Template property. Example:

- Through the template editor window. To open the graphical window, click the
 button. The editor window changes depending on the application category. Examples of the interface are given in the subsection Template Editor Interface.
Application Categories
Control search is supported in the following categories:
- Browser
- Desktop (desktop applications)
- SAP
For more details, see the Application Categories section.
Pattern Editor Interface
In Studio, it is possible to use:
- the old pattern editor;
- updated editor.
You need to set the desired editor display in Studio settings. To do this, go to the File > Settings > General > Elements section and check/uncheck the Use old pattern editor parameter.
Search Process
Let’s consider how the component search process works using the Calculator application (category Desktop) as an example.
From the point of view of Windows, the application consists of a number of components (buttons, text fields, tables) combined into a tree. Any button that the user sees in the program interface will be part of this tree. In turn, each component has a set of properties: they identify the application element, provide information about its specifics and purpose, and break down all desktop components into tags and classes.
To identify a component, Primo RPA also uses search by its properties.
Open the Calculator application in Windows. Create a new project in Studio and perform the following actions:
- Add an Attach to Application container. Use the
 button in the Title property to quickly specify the application name (Calculator).
 - Place a Mouse Click element in the container.
- On the element panel Mouse Click, click the Select Component button – to automatically add the component to the pattern.
Attention! The Calculator application window must be active!
After clicking the ![]() button, we will move to the window with Calculator to select the desired component. When you hover the pointer over the application element, it will be highlighted, and an enlarged image of it will appear in the upper left corner:
button, we will move to the window with Calculator to select the desired component. When you hover the pointer over the application element, it will be highlighted, and an enlarged image of it will appear in the upper left corner:
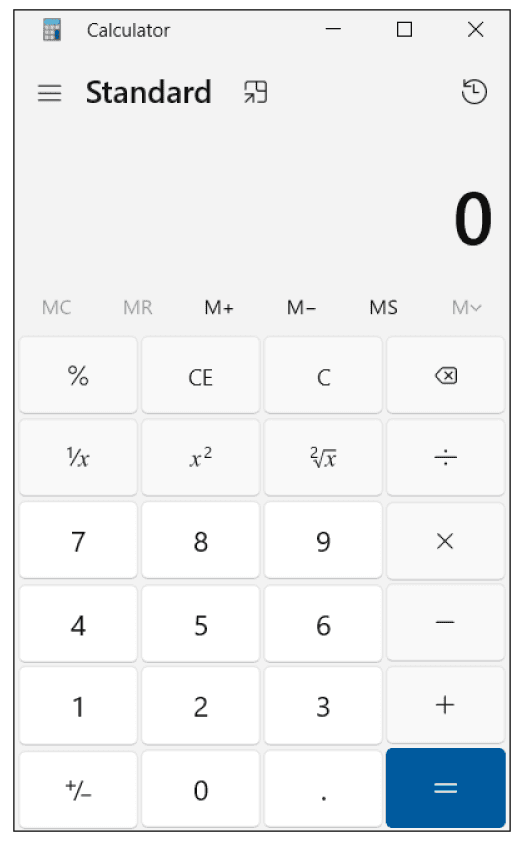
Select the button 5 – a window with the selection of properties for identifying the component will appear:
In the Index property, numbering of elements starts from 1.

You need to select a combination of properties that is unique and immutable for this component. For our case, select the AutomationID, Name (element automation name) parameters and click OK – the selector is created. It will be saved in the JSON file of the search pattern. If you view the finished pattern through the editor window, it will look like this:
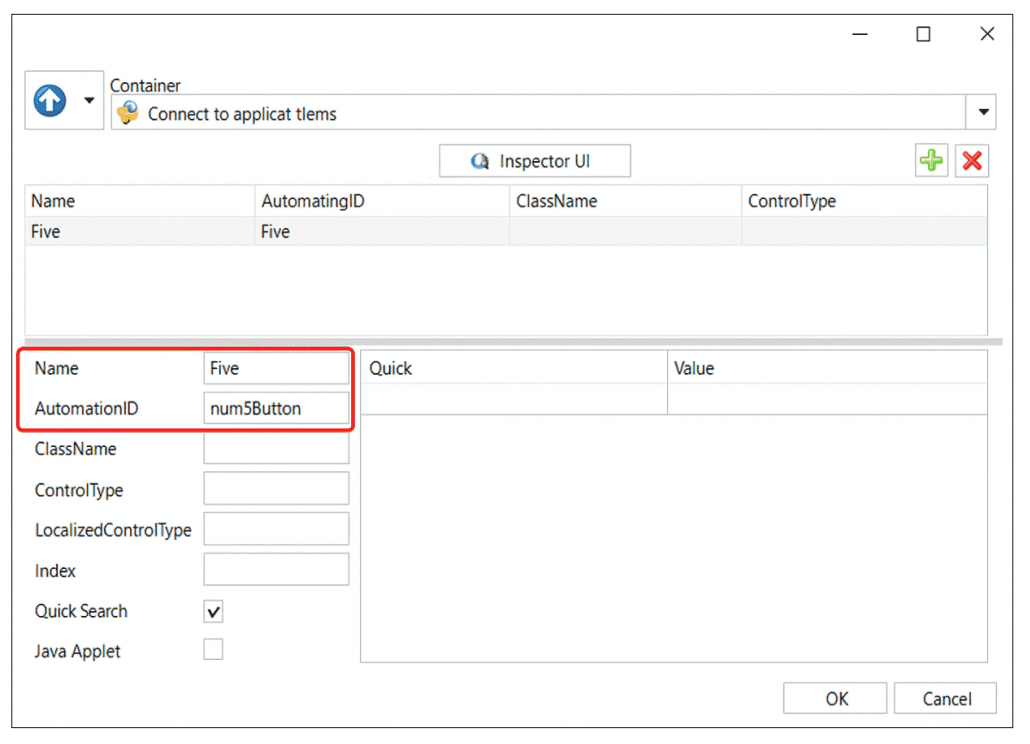
Later, when processing the pattern, the robot will take the specified properties and analyze the component tree in search of a position that has the specified values in the AutomationID and Name parameters. If the values match, the component will be found.
Automatic Application Category Selection
You can select the application category (Desktop, Browser, SAP, Container) in the pattern manually or use automatic detection. Studio automatically determines the category if the user adds a component to the pattern automatically – using the ![]() button.
button.
So, in the Calculator example, the pattern editor window is displayed in Container mode. The system chose this mode because the Mouse Click element is in the Attach to Application container. The system also determined that Calculator, to which a connection is established in the container, belongs to desktop applications, so the settings for desktop applications are displayed in the editor window.
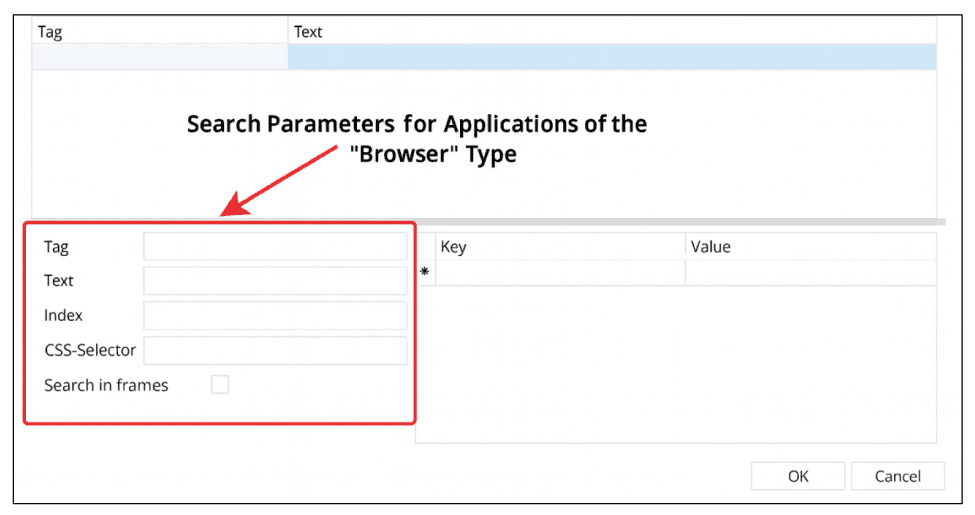
If we used a search pattern for a web application component, and the Mouse Click element was in the Attach to Browser container, then the search parameters in the editor window would correspond to the parameters for the Browser application category:
Search in Frames
The “Search in Frames” property is intended for searching for elements inside HTML frames <frame> and <iframe>, but when using it, there are the following limitations:
- 1. Protected frames: If the frame is protected by browser settings, then searching inside it is impossible.
- 2. Different domains:
The search is not performed if the frame content is loaded from a different domain or host. For example:
- Works:
<iframe src="/local.html">(same domain). - Does not work:
<iframe src="https://externaldomain.com/page.html">(different domain).
- Works:
For correct operation, make sure that the frame loads content from the same domain and does not have security restrictions.
For more details, working with the search pattern in various categories is described in the Application Categories section.
Placing Studio elements in a container saves computer resources and improves work with loaded projects.
Recommendations when working with the search pattern
- Use a desktop scale of 100%. If the scale is greater or less than the specified value, then the search in the browser may be performed incorrectly.
- When working with an RDP session, make sure that:
- the remote desktop scale is equal to 100%;
- intelligent resizing is disabled.
- Use only one monitor. When working with multiple monitors, the search for a control may be performed incorrectly.
UI Explorer
Work with the UI explorer tool is described in more detail here.