Creating a Library
Creating a library involves exporting the current project’s processes as *.dll files. This file can then be used in other projects as a component.
Preparing for Export
Prerequisites:
- .NET Framework 4.6.1 Developer Pack installed on the machine with Primo RPA Studio. Download from the official Microsoft website .
- A project with completed processes to export.
If you attempt to export the project without installing the framework, the process will fail with an error.
Export Process
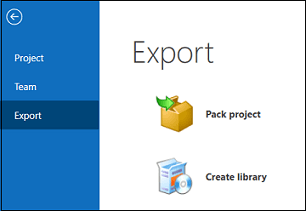
- To create a library, navigate to the File ➝ Export ➝ Create Library menu item.
- A window will appear with the settings for the future library:
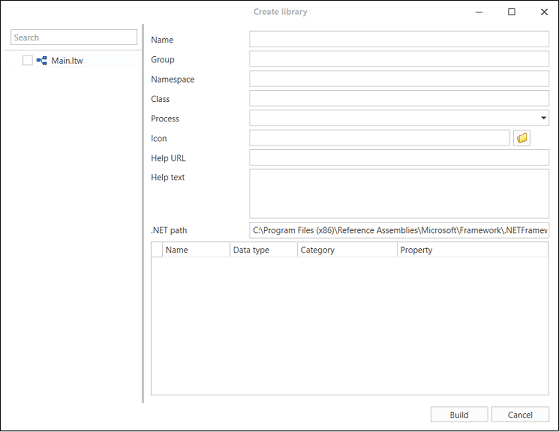
In the left part of the window, in the project tree, select the processes you want to export to the library. To do this, check the boxes next to the desired processes.
Then, fill in the following fields:
- Name - the name of the future element panel, under which it will be displayed in the element panel.
- Group - the name of the group in which this element will be contained in the element panel.
- Namespace - the name of the namespace is specified according to the rules of the C# language (more details can be found here ). Only letters and numbers are allowed. This template contains a general naming rule:
<Company>.(<Product>\|<Technology>)[.<Feature>][.<Subnamespace>]. Example: Fabrikam.Math Litware.Security. - Class - the name of the class, filled in according to the rules of the C# language. Only letters and numbers are allowed. The name should use nouns or a combination of nouns, with the first letter of each word capitalized in accordance with the PascalCasing convention. Do NOT use prefixes in class names (e.g., “C”). Read more about class naming rules here . PascalCasing rules are described here .
- Process - select the process that will be executed when the element is called.
- Icon, Help URL, Help Text - if desired, you can add an icon in *.png format, specify a link to the help page, and the help text itself. These fields are not required.
- .NET Path - specify the path to the standard .NET libraries in the format:
<full path>\{0}.dll. Example:C:\Program Files (x86)\Reference Assemblies\Microsoft\Framework\.NETFramework\v4.6.1\{0}.dll. If this directory does not exist, check that you have .NET Framework 4.6.1 Developer Pack installed.
For components with custom properties (including string lists), all declared properties will automatically become available in the component’s property palette.
Next, specify the names and categories of the arguments for the starting process. This information will be used when displaying the component’s properties in the property palette.
Completing the Export
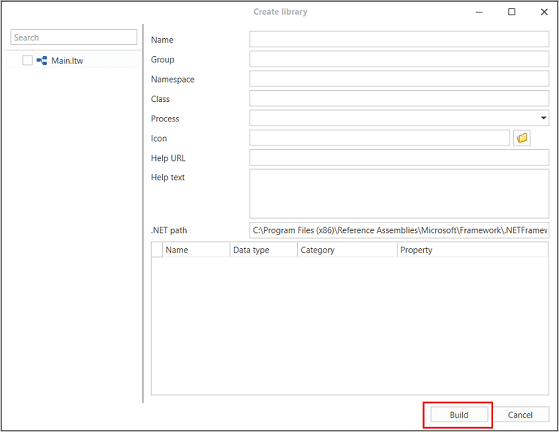
- To complete the export, click the Build button at the bottom of the dialog:
- In the window that opens, select the path to save the *.dll file and File Name (must start with “Primo”).
Publishing and connecting to a project is done based on the same rules as for SDK projects.
The created library can be published as a NuGet package.