Working with Projects
An RPA project is one or more scenarios for automating business processes, united by a common business goal. Each scenario consists of a set of automated actions (elements).
Project Structure
Within the file system, a project looks like this:
Project Folder
- Folder1
- Scenario1.ltw
- Scenario2.ltw
- …
- Folder2
- …
- .Dependencies — The project’s dependency folder. It displays all libraries and their files that the developer has added to the project. For more information on adding libraries, see Dependency Management.
- .Screenshots — The default folder where project screenshots are saved. For example, screenshots of an element’s completion, error screenshots (configured in the element’s general properties). Screenshot name contains the element ID. This folder is displayed if screenshots are available; otherwise, it is absent.
- .Resources — The project’s resource folder. It stores screenshots associated with the element during development. Screenshot name contains the element ID. This folder is displayed if screenshots are available; otherwise, it is absent.
- dependencies.xml — a file containing information about installed dependencies and namespaces that can be used in the project.
- Main.ltw — a process that is automatically created in a new project. This process is usually designated as the project’s startup process.
- Main.ltw.bak — a backup copy of the process. Creation of backup files is controlled in Studio settings. To enable backups, check the Autosave processes checkbox and specify the autosave interval. To disable, clear this checkbox.
- project.ltp — root project file, containing the necessary properties and project data.
- project.ltr — an XML file with the project’s debug configuration. It automatically records all breakpoints set in the project, skipped elements, watches, Git settings, and the most recently opened process tabs. The file is only needed for working on the project in Studio, so it is not included in the files of the finished project published for deployment.
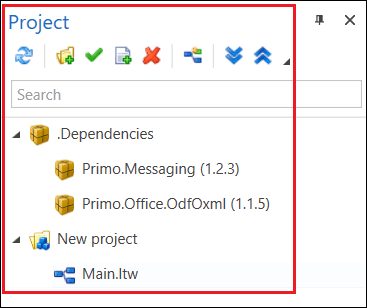
In Primo RPA Studio, project structure is displayed in the Project panel. For example:
Create Project
- Go to File ➝ Project and click the New Project button. This will open the project addition form.
- Specify the project name, path to the storage location, and, optionally, a brief description. If the Create Folder checkbox is checked, the project will be created in the folder with the specified name.
- Finally, click OK.

Done. The project is now added and ready for work. You can view its structure in the “Project” panel.
By default, a process named “Main.ltw” is created in the project and automatically opens in the Studio workspace. You can navigate to it to add your first automation elements.
Save Project
In the “Home” menu tab, click the Save Project button to save all changes to open project processes.
You can also use the following keyboard shortcuts:
Ctrl+S— saves the current process (*.ltw file).Ctrl+Shift+S— saves the entire project.
By default, the project will be saved in the user’s documents unless a different path was specified when creating the project. An example of the default path is: C:\Users\<user_name>\Documents\Primo\<Project_name>.
If you don’t remember where you saved the project, you can always check it in Studio. To do this, in the “Project” panel, open the context menu of the open project/process and select Open in Explorer.

🔹 Note: You can configure project autosaving. Simply go to File ➝ Settings ➝ General and set the desired period in the Process autosave setting.
Open Project
You can open an existing project in the File ➝ Project menu by clicking the Open Project. In the dialog box, specify the root file (project.ltp) of the project.
Other Project Actions
The following action buttons are located at the top of the Project panel:

- Refresh Project
- Create Folder
- Add File
- Update Project
- Edit Item
- Delete item
- Create process
- Expand/collapse folders
New Folder
The New Folder button ![]() adds a new folder to your project structure.
To do this, in the “Project” panel, click the folder that will become the parent folder and then click New Folder.
adds a new folder to your project structure.
To do this, in the “Project” panel, click the folder that will become the parent folder and then click New Folder.
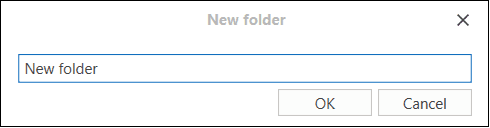
In the dialog, enter a name for the folder and click OK.
The folder will be created on disk and will appear in the project structure.
New Process
The New Process button ![]() adds a new scenario file (*.ltw) to the project. You can also add a process using the keyboard shortcut
adds a new scenario file (*.ltw) to the project. You can also add a process using the keyboard shortcut Ctrl + N.
To move processes/folders, simply drag them to the desired project node.
For more information on working with processes, see here.
Add File
The Add File button ![]() adds a file to the project that the robot can access during process execution.
adds a file to the project that the robot can access during process execution.
To do this, click the project folder and click Add File or use the context menu command of the same name. In the dialog, select the file and click Open.
There is an even easier way to add a file: simply drag it from File Explorer to your project panel.
Refresh Project
When adding a file manually, you may need to reload the project structure. To do this, use the Refresh Project button ![]() . This will reload the project structure from disk.
. This will reload the project structure from disk.
Edit Item
The Edit Item button ![]() allows you to edit the created folder or process.
allows you to edit the created folder or process.
🔸 You cannot change the project path specified during creation.
Delete Item
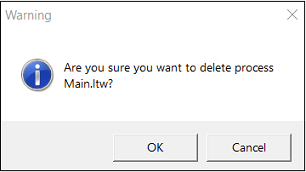
The Delete Item button ![]() deletes an item (file, process, or folder) from the project.
To do this, select the item, click the button, and confirm the action.
deletes an item (file, process, or folder) from the project.
To do this, select the item, click the button, and confirm the action.
Collapse/Expand Folders
The Collapse/Expand Folders buttons ![]() help you show or hide the contents of folders in the Project panel.
help you show or hide the contents of folders in the Project panel.