OCR Pattern Editor
The OCR Pattern Editor is a Studio tool used to develop templates for reading scanned documents. To launch the editor, go to the Tools ➝ OCR Pattern Editor menu.
Currently, the editor supports OCR from Microsoft (built into Windows OS, starting with version 8) and Yandex Vision. This tool is constantly being improved based on user feedback.
Main Menu Components
- New pattern
- Open pattern
- Save pattern
- Save pattern As
- Test pattern
- Test Image
- Settings
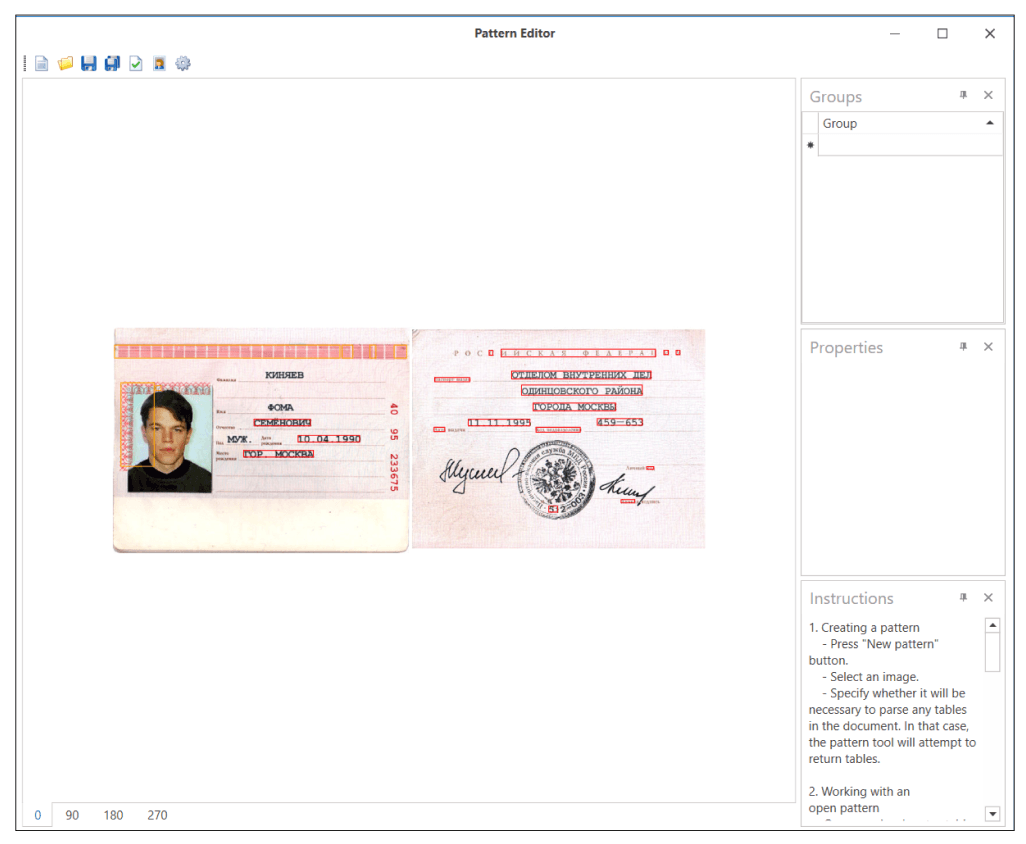
- Main window of the recognized image of the template document
- Template document rotation tabs
- Text groups
- Properties
Creating and Configuring an OCR Template
To create a new template, click Create pattern, then select a file with a scanned reference document. This file will be recognized using OCR: text blocks will be highlighted in it (marked with red rectangles), and the resulting image along with the blocks will be displayed on the screen.
Anchors and Groups in OCR Templates
Anchors and Groups are key elements used in OCR templates to accurately extract data from documents.
Anchors
An Anchor is an area on a document that does not change from document to document. For example, in PTS documents, this may be the heading “Registration Date”.
- Examples of use:
- In a vehicle passport (PTS), the heading “Identification Number” can be used as an anchor. This text is always present in the document, and the system uses it to find the VIN code of the vehicle located nearby.
- If there is a table in the document, the anchor can be attached to the column heading to extract values from the desired column or row.
Groups
A Group is a set of text blocks that form useful data. The group is located in a unique position relative to the selected anchors or is located in specified coordinates (proportional to the image size).
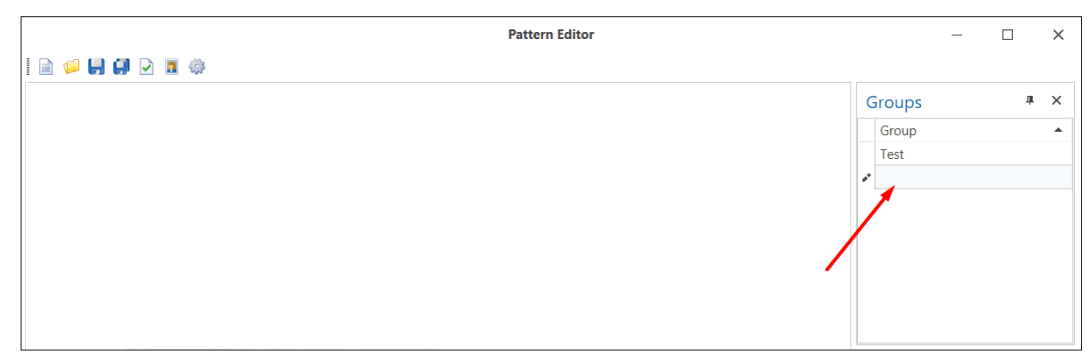
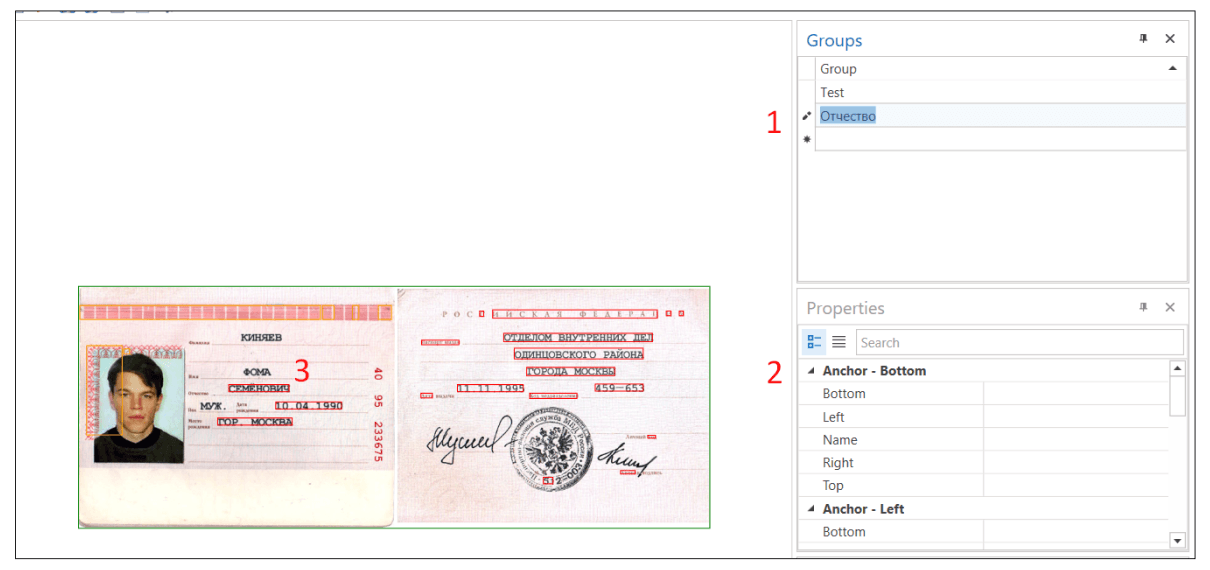
Existing group names are arranged in alphabetical order. When creating a new group, the list is updated, and the new group is automatically placed in alphabetical order. To create a new group, double-click the star (*) icon and enter the name of the new group.
When selecting a specific group on the scanned document, the corresponding area is highlighted with a green frame, making it easy to identify. Then you can change the parameters of this group in the “Properties” panel.
Text Block Properties
To work with the properties of text blocks, click the mouse on the red rectangle of the desired block. Each found block has the following properties:
| Property | Description |
|---|---|
| OCR | |
| Name: | The name of the text block for display in the group properties. |
| Text: | The value of the text block recognized when scanning the image. In case of errors, the value can be edited manually. |
| Anchor Properties: | |
| Anchor: | Use the text block as an anchor for other blocks. |
| Case sensitive: | Determines whether to consider the case of letters when matching text. If the option is enabled, OCR will distinguish between uppercase and lowercase letters. |
| Number of single-character edits: | The parameter determines how much deviation of the text from the original template is allowed during its recognition. Based on the Levenshtein distance concept, which measures how many minimal changes (insertions, deletions, or replacements of characters) are needed to transform one text into another. Available since version 24.8 |
| Regular expression (Replace): | Allows you to specify a regular expression to replace the found text. For example, you can replace all spaces in a phone number with hyphens. |
| Regular expression (Match): | Allows you to specify a regular expression to search for text that matches a specific pattern. You can use regular expressions to search for dates, numbers, or other specific text formats. |
| Spaces: | Consider spaces in the recognized value. |
Working with Language Settings
Since Studio version 24.8, a new property Pattern language has been added, which allows you to specify and save the language for recognizing text. When loading a saved template, the language is automatically set in the settings. If the user changes the template language manually, the system will prompt you to rescan the text in the new language before saving, which may lead to a shift in the anchors.
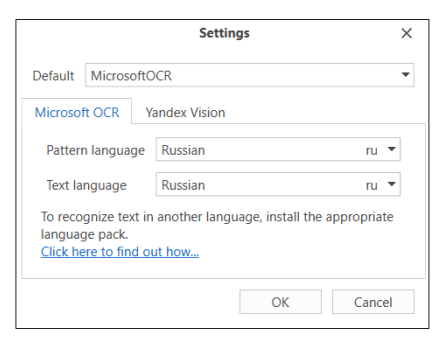
For correct operation, the selected OCR language must be installed in the operating system. If you need to install additional languages, visit the Microsoft support website at the following link: Installing a language for Windows .
Number of single-character edits
- The *Regular expression (Replace), *Regular expression (Match) and Number of single-character edits > 0 properties cannot be used simultaneously.
- If strict matching is required, the “Number of single-character edits” value must be set to 0. Any deviation (even one letter or space) will cause the text not to be considered a match for the template.
- If the parameter is set to a positive number, this value indicates how many changes are allowed in the text so that it is still considered a match for the template. For example, if “Number of single-character edits” is equal to 2, the text may differ by two characters (for example, one letter may be replaced by another, or a space may be added/deleted), and it will still be recognized as suitable.
Working with Existing Templates
It is important to consider that OCR technology works effectively only with documents of high quality and resolution. Pre-installed recognition templates are included with Studio. To test the template, click the “Test pattern” or “Test image” button in the editor menu.
Test pattern checks the image attached to the template, while Test image requires selecting a file. The processing results will be displayed on the screen.
When loading old templates created before adding the “Pattern language” property, you must manually specify the language, as this property did not exist before. Rescanning is not required if the language does not change to avoid shifting the anchors. However, it is recommended to save the template after specifying the language to prevent possible errors in the future.
Completing Work with the Template
After completing all template settings, you must save it to disk. The saved template can be used in the Recognize form element to automate the process of recognizing text in documents.